Category: Practical Advice

  • How to Identify a Mid-Century Modern Home: Key Features, Architects and Eras

    Walk down the right street in Palm Springs, Denver, or the San Fernando Valley and you can feel it before you can name it: low rooflines, walls of glass, a carport instead of a garage, and a house that seems to sit in the landscape rather than on top of it. Learning to recognize mid century modern house characteristics is the first step toward becoming a good steward of one, whether you already own a 1958 ranch or you are touring open houses hoping to find your own piece of the postwar boom. This guide covers the defining features, the architects and builders who shaped the movement, and the eras that produced America’s most beloved modern homes.

    At Clyne Heritage Homes, we hear the same question constantly: “Is my house actually mid-century modern, or is it just old?” It is a fair question. Millions of American houses were built between 1945 and 1975, and only a fraction of them carry the design DNA we are talking about here. By the end of this article, you will be able to read your own house the way a preservationist does.

    Defining the Era: When Was Mid-Century Modern Built?

    Historians argue about exact boundaries, but for practical purposes the mid-century modern period in American residential architecture runs from about 1945 to 1970, with the creative peak falling between 1950 and 1965. Within that window, a few distinct phases are worth knowing:

    • 1945 to 1950: The experimental years. Wartime material science met a massive housing shortage. The Case Study House program, launched by Arts & Architecture magazine in 1945, commissioned architects to design low-cost, replicable modern homes, and roughly two dozen were eventually built, mostly in the Los Angeles area.
    • 1950 to 1960: The tract-home golden age. Developers like Joseph Eichler in Northern California and the Alexander Construction Company in Palm Springs proved that modernism could be mass produced. Eichler alone built around 11,000 homes between 1949 and 1966.
    • 1960 to 1970: The late period. Rooflines got bolder, A-frames and folded-plate roofs appeared, and modernist ideas filtered into ordinary builder ranches across the country, from Denver’s Krisana Park to the suburbs of Dallas and Minneapolis.

    A house built in 1952 is not automatically modern, and a house built in 1972 is not automatically excluded. The date narrows the field; the features settle the question.

    The Core Mid Century Modern House Characteristics

    No single feature makes a house mid-century modern. Instead, look for a cluster of the following traits. In our experience, a genuine example will show at least five or six of them.

    1. Low-Slung, Horizontal Massing

    Mid-century homes hug the ground. Single-story layouts dominate, ceiling heights typically run 8 feet in bedrooms and rise toward 10 or 12 feet in living areas, and the overall silhouette emphasizes long horizontal lines. Even two-story examples, like split-levels, break the height into staggered horizontal planes rather than a vertical box.

    2. Flat or Low-Pitched Rooflines

    The roof is often the fastest tell. Look for flat roofs, low gables pitched between 2:12 and 4:12, butterfly roofs (two planes sloping inward toward a central valley, popularized by Palm Springs architect William Krisel), or dramatic A-frames on later examples. Wide eave overhangs of 2 to 4 feet are common, designed to shade glass walls from summer sun while admitting low winter light.

    3. Post-and-Beam Construction

    Instead of hiding the structure inside walls, many mid-century architects exposed it. Post-and-beam framing carries the roof on widely spaced timber posts, which frees exterior walls from load-bearing duty and allows them to become glass. Inside, you will often see exposed beams, typically 4×10 or 4×12 Douglas fir, running the full length of the house, with tongue-and-groove roof decking visible between them.

    4. Walls of Glass and Clerestory Windows

    Floor-to-ceiling glass, sliding doors that open living rooms to patios, and clerestory windows (narrow horizontal bands of glass set high on the wall, just below the roofline) all serve the movement’s central idea: dissolving the boundary between indoors and outdoors. Original glazing is almost always single-pane, which matters enormously for restoration decisions.

    5. Open, Flowing Floor Plans

    The formal parlor died in 1945. Mid-century plans merge kitchen, dining, and living areas into one continuous space, often organized around a central fireplace or an atrium. Room-dividing elements tend to be partial: a half-height bookcase, a screen block wall, or a floating cabinet rather than a full partition. A typical 1955 tract example runs 1,200 to 1,800 square feet yet lives much larger because of this openness.

    6. Honest, Mixed Materials

    Materials are used frankly and left visible: concrete slab floors (sometimes with radiant heating pipes embedded), terrazzo, cork, exposed brick or concrete block, mahogany and birch paneling, and vertical grooved siding. Decorative concrete screen block, especially common in Arizona, Florida, and Southern California, is practically a signature of the era.

    7. Integration with the Landscape

    Carports rather than enclosed garages, courtyards and atriums, deep overhangs sheltering outdoor rooms, and orientation that follows the sun rather than the street. Where a Victorian addresses the street with a formal face, a mid-century home often turns a nearly blank facade to the street and opens itself completely to a private rear yard.

    The Architects and Builders Worth Knowing

    Attaching a name to your house changes how you care for it, and sometimes what it is worth protecting. These are the figures whose work you are most likely to encounter in the wild.

    The Icons

    • Richard Neutra: Austrian-born Los Angeles architect whose Kaufmann Desert House (1946) in Palm Springs remains the movement’s postcard. Steel framing, pinwheel plans, and razor-thin rooflines.
    • Charles and Ray Eames: Their 1949 Case Study House No. 8 in Pacific Palisades assembled a home from off-the-shelf industrial parts and changed how architects thought about prefabrication.
    • Pierre Koenig: Stahl House (Case Study House No. 22, 1960), the glass pavilion floating over Los Angeles that appears in half the photography books ever printed about modernism.
    • Frank Lloyd Wright: His Usonian homes of the late 1930s through the 1950s, with their flat roofs, radiant slabs, and carports (a word Wright popularized), set the template many mid-century builders followed.

    The Volume Builders

    • Joseph Eichler: The developer who hired real architects (A. Quincy Jones, Anshen & Allen, Claude Oakland) to design affordable modern tract homes around the San Francisco Bay Area and Los Angeles. Atriums, radiant-heated slabs, and mahogany paneling are Eichler hallmarks.
    • William Krisel and Dan Palmer: Designed more than 30,000 homes across Southern California and Palm Springs, including the Alexander tracts, proving that a butterfly roof could be a production item.
    • H.B. Wolff and Company: Brought Eichler-inspired modernism to Denver’s Krisana Park and Lynwood neighborhoods in the mid 1950s, a reminder that this movement was never just a coastal story.

    Regional modernists matter too: E. Stewart Williams and Albert Frey in Palm Springs, Harwell Hamilton Harris in Texas, Ralph Twitchell and Paul Rudolph in Sarasota, and dozens of talented local architects whose drawings are still sitting in county permit archives waiting to be rediscovered.

    Mid-Century Modern vs. Its Cousins

    Plenty of postwar houses share a birthday with modernism without sharing its ideas. Here is how to tell the relatives apart:

    • The minimal traditional cottage (1935 to 1950): Small, hipped or gabled roof, little ornament, but a closed plan and conventional double-hung windows. Transitional, not modern.
    • The standard builder ranch (1945 to 1975): Long and low like its modernist cousin, but with a closed kitchen, picture windows rather than window walls, and traditional detailing such as shutters and wrought iron. Many ranches carry a few modern touches; the cluster test tells you how far to lean.
    • The split-level (1955 to 1975): Can be genuinely modern (clerestories, open plans, exposed beams) or entirely conventional. Judge it feature by feature.

    A useful rule of thumb: modernism is about light, structure, and flow. Style applied to the surface of a conventional plan, however charming, is a different animal.

    Reading Your Own House: A Practical Checklist

    Spend an hour with a notepad and walk your property in this order:

    1. Stand across the street. Is the massing horizontal? Is the roof flat or pitched below about 4:12? Are eaves 2 feet deep or more?
    2. Check the glass. Measure your largest window opening. Anything over 6 feet wide, or any band of clerestories, points toward a deliberate modern design.
    3. Look up inside. Exposed beams or tongue-and-groove ceilings are strong evidence. So is a ceiling that follows the roof pitch instead of hiding under a flat drywall lid.
    4. Look down. A concrete slab (no basement or crawlspace under the main living areas) is typical of the type in most regions, and warm floors in winter may mean original radiant heat.
    5. Trace the plan. Can you see the kitchen from the living room? Does a glass door connect the main living space to a patio? Openness was designed, not remodeled, if the beam layout supports it.
    6. Hunt for original details. Flush slab doors, starburst or orb light fixtures, screen block, built-in planters, and original bathroom tile in pink, aqua, or yellow all suggest the house has survived with its character intact.

    Score five or more of these and you are very likely holding the keys to a genuine mid-century modern home. See also: The Hidden Challenges of Heritage Home Ownership: What to Expect in Your First Year for an honest look at what stewardship involves once the identification thrill wears off.

    Researching the Paper Trail

    Features tell you what the house is; documents tell you who made it. Start with your county assessor’s record for the construction date, then request the original building permit, which in many jurisdictions lists the architect or designer of record. Neighborhood context helps too. If three houses on your block share your roofline, you are probably in a tract, and tract names (Krisana Park, Arapahoe Acres, Vista Las Palmas, Greenmeadow) can often be identified through a local historical society or a preservation group such as Docomomo US, which maintains chapters across the country.

    Why does the name matter? Because documented architectural pedigree changes preservation stakes for a whole neighborhood. A typical owner of an unremarkable-seeming 1959 tract home has, more than once, discovered a significant architect behind it, and that discovery has rallied entire communities. See also: Saved from Demolition: How One Community Preserved a Significant Mid-Century Neighborhood for a case study in what organized neighbors can accomplish.

    Regional Dialects of the Same Language

    Mid century modern house characteristics shift with climate, and recognizing your regional dialect sharpens identification considerably. In Palm Springs and Phoenix, expect flat roofs, deep overhangs, screen block, and glass oriented away from the punishing western sun. In the Pacific Northwest and Northern California, roof pitches rise slightly to shed rain, wood siding darkens to blend with fir forests, and glass chases the scarce winter light. Denver and the mountain states favored brick veneer over the slab-and-glass formula, with genuinely modern plans wrapped in more weather-resistant skins; Arapahoe Acres in Englewood, the first postwar subdivision listed on the National Register of Historic Places (1998), shows the range beautifully. Florida contributed terrazzo floors, jalousie windows, and concrete block construction rated for hurricanes, while the Midwest produced thousands of modest modern ranches whose flat-roofed carports and clerestories quietly carry the same ideas in colder air.

    None of these variations disqualify a house. They are evidence of the movement doing exactly what it promised: responding to site, sun, and climate rather than pasting one facade onto every landscape.

    Common Identification Mistakes

    • Trusting the county construction date alone. Assessor records are frequently off by 2 to 5 years, and a 1948 date does not make a minimal traditional cottage modern.
    • Judging by furniture. An Eames chair in the listing photos says nothing about the architecture. Read the bones, not the staging.
    • Missing a remuddled original. Vinyl windows, a pitched roof conversion, and 1990s cladding can hide a genuinely modern house. Beam spacing, window head heights, and the original plan usually survive underneath; permit records reveal the rest.
    • Seeing modernism everywhere. Enthusiasm is wonderful, but calling every low ranch a Neutra dilutes the case for protecting the real thing. Rarity, documented design, and intactness are what preservation boards weigh.

    Why Identification Is the Foundation of Good Stewardship

    Every restoration decision you will ever make flows from understanding what you have. Knowing that your windows are original steel casements rather than 1980s replacements changes whether you restore or replace. Knowing that your slab contains 1954 radiant piping changes how you approach flooring. Knowing that your house is one of 40 surviving examples of a documented architect’s tract work changes everything.

    Identification also protects you from well-meaning mistakes. The saddest houses we encounter are not the neglected ones; neglect is reversible. They are the enthusiastically remodeled ones, where vaulted ceilings were flattened, window walls were shrunk to fit stock vinyl sizes, and open plans were carved into rooms because nobody recognized what the house was trying to be.

    So before you pick up a sledgehammer or even a paintbrush, spend the hour with the notepad. Learn your rooflines and your beam spans, find your permit, and meet your architect, even if the meeting happens 70 years late in a county archive. Your house has been waiting patiently to introduce itself. All you have to do is learn its language.
  • Electrical Systems in Mid-Century Homes: Safety Upgrades and Period Lighting Solutions

    Electrical Systems in Mid-Century Homes: Safety Upgrades and Period Lighting Solutions

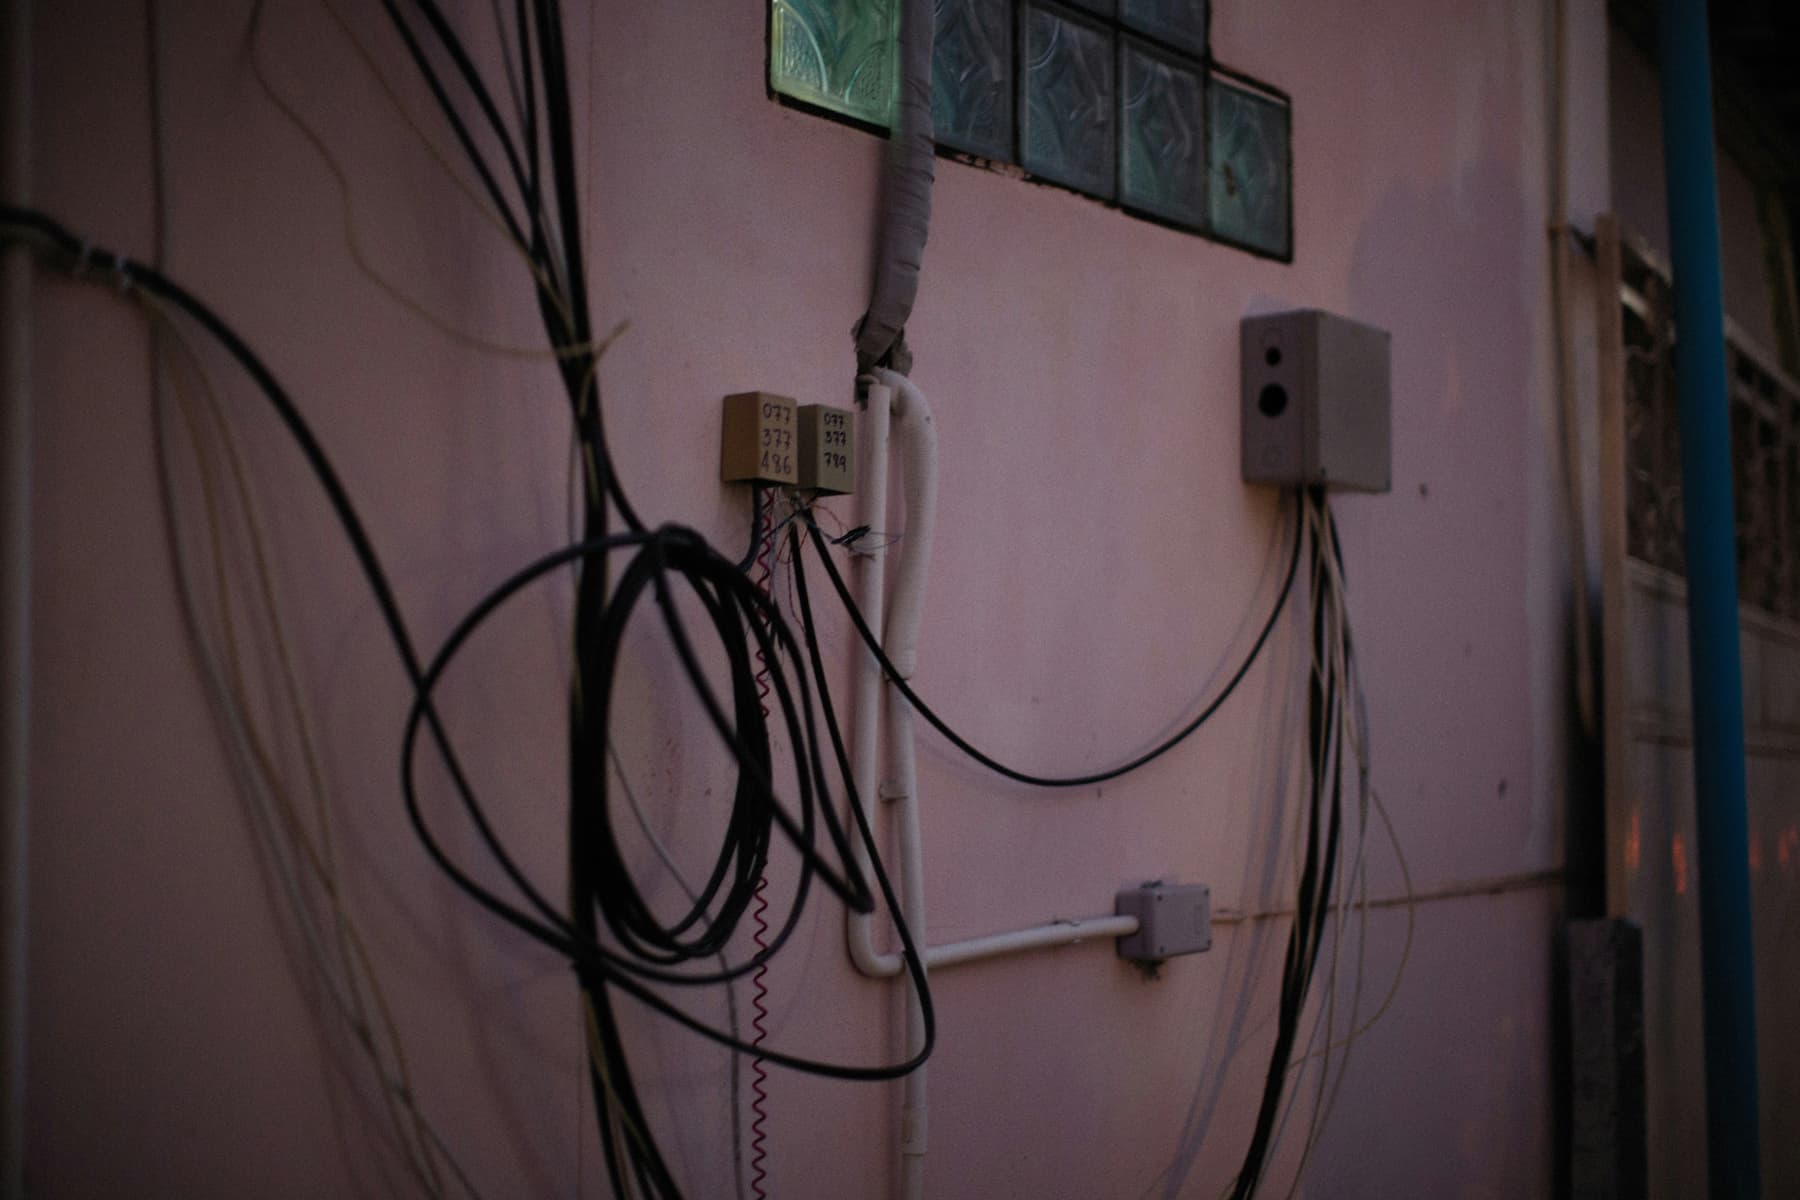
    When we fall in love with a mid-century home, it’s rarely because of what’s behind the walls. We’re captivated by the open floor plans, walls of glass, and distinctive architectural details. Yet for all their forward-thinking design, mid-century homes often harbor electrical systems that were cutting-edge in 1958 but potentially hazardous by today’s standards.

    At Clyne Heritage Homes, we understand the delicate balance between preserving architectural authenticity and ensuring modern safety and functionality. Nowhere is this balance more critical than with electrical systems and lighting—elements that impact both safety and aesthetics. Here’s our comprehensive guide to upgrading mid-century electrical systems while honoring period lighting design.

    Understanding What You’re Working With

    Common Electrical Systems in Mid-Century Homes

    Mid-century homes (generally built between 1945-1975) typically feature electrical systems that reflect the more limited demands of the era:

    Service Panels

    • 60-amp service (compared to modern 200-amp minimum)
    • Fuse boxes rather than circuit breakers in homes built before the 1960s
    • Early circuit breaker panels that may now be considered unsafe (Federal Pacific, Zinsco)

    Wiring Types

    • Cloth-wrapped wiring (1940s-early 1950s)
    • Aluminum wiring (common in 1960s-1970s)
    • Early Romex without grounding (two-prong outlets)
    • Knob-and-tube wiring in some older homes that were updated during the mid-century period

    Outlet and Switch Configurations

    • Limited number of outlets per room
    • Few dedicated circuits for specific appliances
    • Rarely GFCI protected in kitchens or bathrooms
    • Distinctive, often bakelite switches and outlet covers

    “Most mid-century homes were designed when people owned maybe one television, a radio, and a few small appliances,” explains master electrician Thomas Reynolds. “Today’s technology-driven households can place tremendous strain on these original systems.”

    Assessing Your System’s Condition

    Before planning upgrades, a thorough assessment is essential. Warning signs that your electrical system needs immediate attention include:

    • Flickering lights when appliances run
    • Frequently tripped breakers or blown fuses
    • Warm or discolored outlets or switches
    • Buzzing sounds from outlets or panels
    • Burning smells near electrical components
    • Two-prong outlets throughout the home
    • Original Federal Pacific or Zinsco panels

    A certified electrician with experience in heritage homes can provide a comprehensive evaluation, identifying both hazards that require immediate attention and less urgent upgrades that can be phased in over time.

    Safety First: Essential Electrical Upgrades

    Critical Systems to Address

    While some aspects of electrical renovation allow for flexibility and phasing, certain elements should be prioritized for safety:

    Service Panel Upgrades Upgrading from original 60-amp service to modern 200-amp capacity is typically necessary to meet contemporary demands. This usually involves:

    • Replacing the main panel
    • Upgrading the service entrance cable
    • Coordinating with your utility company
    • Obtaining proper permits and inspections

    Hazardous Wiring Replacement Certain wiring types require prompt replacement:

    • Aluminum wiring (fire hazard due to connection deterioration)
    • Degraded cloth-wrapped wiring
    • Any wiring with damaged insulation
    • Knob-and-tube sections that may remain in walls

    Grounding System Implementation Many mid-century homes lack proper grounding, evidenced by two-prong outlets. Adding a complete grounding system:

    • Protects sensitive electronics
    • Reduces shock hazards
    • Allows for proper GFCI protection
    • Creates pathways for fault currents

    GFCI Protection Installation Ground Fault Circuit Interrupter protection is essential in:

    • Kitchens (especially near sinks)
    • Bathrooms
    • Outdoor outlets
    • Garage spaces
    • Basements

    Working with Heritage Home Considerations

    When upgrading electrical systems in mid-century homes, several unique challenges require thoughtful solutions:

    Accessing Wiring in Distinctive Walls Mid-century homes often feature materials that are difficult to open and repair:

    • Wood paneling
    • Lath and plaster construction
    • Concrete or terrazzo floors
    • Built-in cabinetry and features

    “The goal is to upgrade systems with minimal disruption to original materials,” notes heritage home contractor Rebecca Chen. “Sometimes that means creative approaches like running new wiring through closets or existing chases rather than opening walls.”

    Documentation Before Opening Walls Before any intrusive work begins:

    • Photograph all visible original features
    • Create detailed drawings of built-ins or distinctive elements
    • Work with your electrician to identify least-invasive access routes

    Phased Approaches for Budget Management When full rewiring isn’t immediately feasible:

    • Address critical safety concerns first
    • Create a prioritized plan for remaining updates
    • Consider partial rewiring of key areas (kitchens, home offices)
    • Add dedicated circuits for high-demand areas while planning more comprehensive updates

    Preserving Period Lighting While Enhancing Function

    The Significance of Mid-Century Lighting Design

    Lighting in mid-century homes wasn’t just functional—it was an integral architectural element with distinctive characteristics:

    Architectural Integration

    • Recessed soffit lighting highlighting ceiling planes
    • Hidden cove lighting creating ambient glow
    • Built-in lighting in cabinetry and shelving
    • Indoor-outdoor lighting continuity

    Distinctive Fixture Types

    • Geometric pendant fixtures
    • Tension-pole floor-to-ceiling lamps
    • Wall-mounted sconces with distinctive shades
    • Atomic and starburst chandelier designs
    • Globe fixtures in various configurations

    Technological Innovation

    • Early track lighting systems
    • Integrated fluorescent fixtures
    • Novel dimming systems
    • Indoor-outdoor lighting continuity

    “Mid-century lighting designers like Gino Sarfatti, George Nelson, and Isamu Noguchi approached lighting as sculpture,” explains architectural historian Margaret Williams. “Their fixtures weren’t just illumination—they were integral design elements expressing the optimism and innovation of the era.”

    Approaches to Lighting Preservation and Enhancement

    Restoring Original Fixtures

    When original lighting remains, restoration is often the most authentic approach:

    • Rewiring with modern, safety-compliant components
    • Converting to LED-compatible sockets where appropriate
    • Repairing or fabricating damaged shades or diffusers
    • Cleaning and refinishing metal components

    The Palmers, owners of a 1962 California contemporary in Denver, discovered original recessed soffit lighting behind later renovations. “We carefully restored the continuous lighting track, but replaced the original incandescent system with LED strips that provide the same warm glow while using a fraction of the electricity,” explains homeowner Michael Palmer.

    Finding Period-Appropriate Replacements

    When original fixtures are missing or beyond repair:

    • Source vintage fixtures from architectural salvage
    • Consider quality reproductions from specialty manufacturers
    • Commission custom recreations based on period documentation
    • Explore contemporary fixtures inspired by mid-century aesthetics

    Resources for authentic replacements include specialized lighting dealers, online marketplaces for vintage items, and manufacturers who produce licensed reproductions of iconic designs.

    Integrating Modern Technology with Period Aesthetics

    Today’s lighting technology can enhance period fixtures while improving functionality:

    • Replace inefficient incandescent bulbs with warm-temperature LEDs
    • Add discreet smart controls to vintage fixtures
    • Incorporate tunable lighting to adjust color temperature
    • Install modern dimmers compatible with LED technology

    “The key is choosing the right color temperature,” advises lighting designer James Chen. “Most mid-century homes were designed around the warm glow of incandescent lighting. Choose LEDs in the 2700-3000K range to maintain that authentic ambiance.”

    Room-by-Room Lighting Considerations

    Living Areas Mid-century living spaces typically featured layered lighting:

    • Perimeter soffit or cove lighting for ambient illumination
    • Statement ceiling fixtures in conversation areas
    • Task lighting via distinctive floor and table lamps
    • Accent lighting highlighting architectural features or art

    When upgrading, maintain this layered approach while incorporating modern controls that allow flexible use of the space.

    Kitchens Kitchen lighting presents particular challenges, as original illumination rarely meets contemporary standards:

    • Preserve distinctive fixtures over dining areas or islands
    • Supplement with unobtrusive under-cabinet LED lighting
    • Consider recessed ceiling fixtures that match original details
    • Incorporate task lighting that doesn’t compete with period aesthetics

    Bathrooms Original bathroom lighting often combined functional and decorative elements:

    • Wall sconces flanking mirrors (often with distinctive shades)
    • Overhead fixtures with frosted glass or acrylic diffusers
    • Integrated lighting in medicine cabinets or vanities

    When upgrading bathroom lighting, balance period aesthetics with the practical requirements of daily grooming routines.

    Outdoor Integration Indoor-outdoor connection was fundamental to mid-century design, with lighting playing a key role:

    • Restore original exterior fixtures where possible
    • Ensure proper weatherproofing and GFCI protection
    • Consider subtle landscape lighting that highlights architectural features
    • Maintain visual continuity between interior and exterior lighting

    Case Study: Comprehensive Electrical Renovation in a 1959 Rambler

    The experience of the Martinez family illustrates a successful approach to electrical upgrading while preserving period lighting integrity.

    Their 1959 rambler in Minneapolis featured the original 60-amp fuse box, cloth-wrapped wiring, and an eclectic mix of original and replacement lighting fixtures. Their multi-phase approach included:

    Phase 1: Critical Safety Upgrades

    • Replaced Federal Pacific panel with new 200-amp service
    • Installed GFCI protection in kitchen and bathrooms
    • Addressed aluminum wiring connections with proper remediation
    • Added smoke and carbon monoxide detectors

    Phase 2: Strategic Rewiring

    • Created dedicated circuits for kitchen appliances
    • Added properly grounded outlets in home office areas
    • Rewired bathroom with adequate capacity for modern needs
    • Installed new wiring for exterior lighting and security

    Phase 3: Lighting Restoration and Enhancement

    • Restored original recessed soffit lighting with LED technology
    • Sourced period-appropriate replacements for missing dining area fixture
    • Rewired and reinstalled original bedroom sconces
    • Added discreet smart home controls while maintaining vintage aesthetics

    “We approached the project with a ‘preserve what you can, upgrade what you must’ mentality,” explains homeowner Sofia Martinez. “Our electrician worked with our restoration contractor to access wiring through attic spaces and closets, minimizing damage to original walls and ceilings.”

    Working with Professionals: Finding the Right Expertise

    Successful electrical upgrading in heritage homes requires specialized knowledge. When selecting professionals:

    Look for electricians with:

    • Specific experience in heritage or mid-century homes
    • Understanding of older wiring systems
    • Willingness to collaborate with preservation specialists
    • Creative approaches to minimizing structural impact
    • Knowledge of period-appropriate solutions

    Consider involving:

    • Preservation consultants who can advise on historical significance
    • Lighting designers familiar with mid-century aesthetics
    • Restoration specialists who can repair original fixtures
    • Documentation specialists who can record original features

    The most successful projects typically involve collaboration between electrical safety experts and those with knowledge of architectural preservation.

    DIY Opportunities and Limitations

    While major electrical work requires professional expertise, homeowners can tackle certain aspects:

    • Replacing switch plates and outlet covers with period-appropriate styles
    • Basic fixture cleaning and restoration
    • Simple fixture rewiring (with proper guidance)
    • Research and sourcing of authentic replacement fixtures

    However, stay within your skill level and legal limitations—most jurisdictions require licensed electricians for significant electrical work.

    Planning Your Electrical Upgrade: A Timeline Approach

    Given budget constraints, most heritage homeowners benefit from a phased approach:

    Immediate (Month 1-3):

    • Professional safety assessment
    • Address critical hazards (faulty panels, damaged wiring)
    • Install smoke/CO detectors
    • Add GFCI protection in key areas

    Near-term (Months 3-12):

    • Service panel upgrade
    • Dedicated circuits for high-demand areas
    • Rewiring of kitchen and bathrooms
    • Restoration of key lighting fixtures

    Long-term (Year 1-3):

    • Comprehensive rewiring as budget allows
    • Restoration or replacement of all lighting fixtures
    • Smart home integration if desired
    • Documentation of all systems for future reference

    Conclusion: Illuminating the Past, Safely

    Electrical systems in mid-century homes present a unique preservation challenge—balancing the aesthetic integrity of distinctive lighting design with the non-negotiable requirements of electrical safety. By understanding both the technical needs and the design significance of your home’s original systems, you can create solutions that enhance functionality while honoring architectural intent.

    The most successful approaches recognize that mid-century architects and designers were themselves innovators, embracing the newest technologies of their time. They would likely appreciate thoughtful integration of modern electrical capabilities that respect their original vision while making these homes viable for contemporary living.

    Through careful planning, appropriate professional guidance, and a commitment to preserving what makes these homes special, you can create electrical systems that are both safe for today and authentic to the mid-century vision of tomorrow.


    Do you have questions about upgrading the electrical systems in your heritage home? Share your specific challenges in the comments below, or contact us directly for personalized guidance.

    Next week: “Hidden Heating Systems: Restoring Radiant Floor Heat in Mid-Century Homes”

  • Finding Period-Appropriate Hardware: Resources for Authentic Renovation

    Finding Period-Appropriate Hardware: Resources for Authentic Renovation

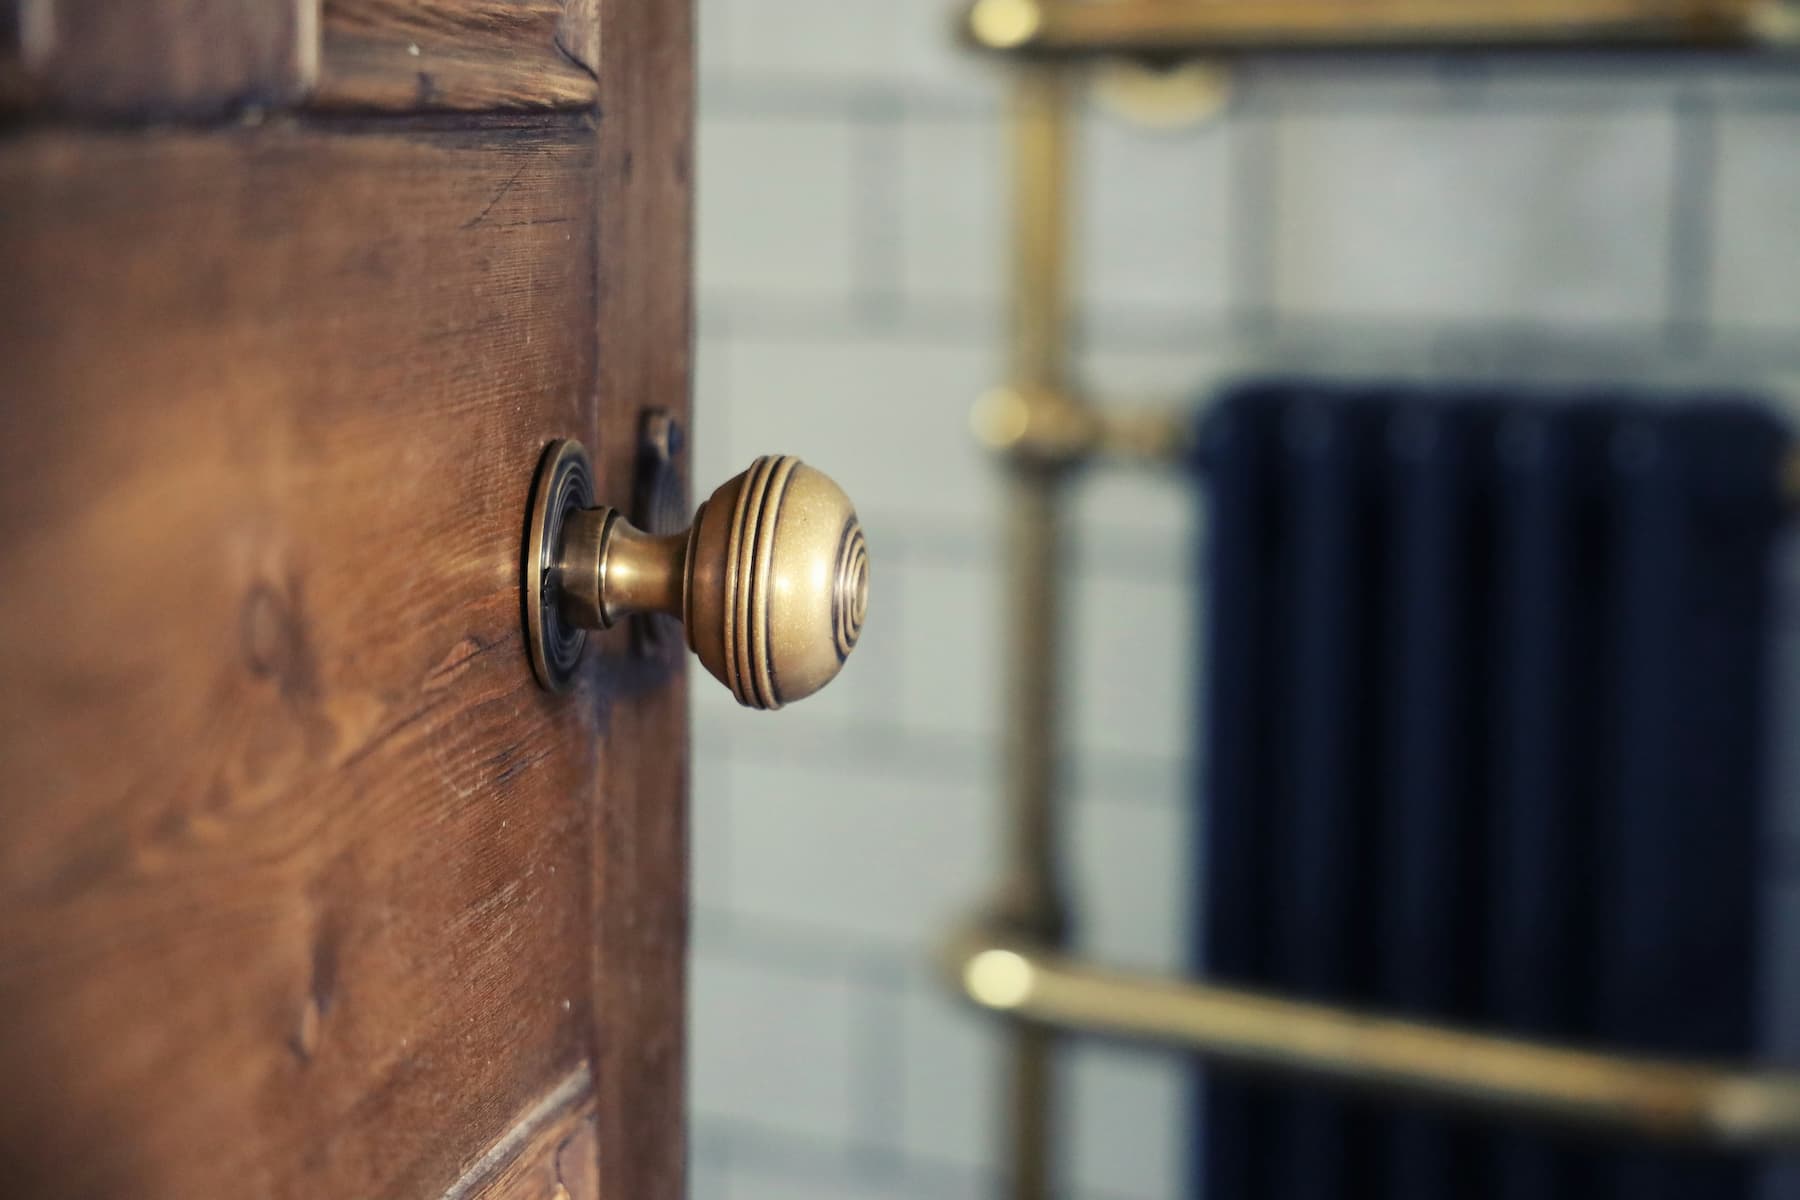
    It’s often the smallest details that make the biggest difference in heritage home restoration. While dramatic architectural features might capture immediate attention, it’s the hardware—doorknobs, cabinet pulls, hinges, house numbers, and light fixtures—that creates the cohesive authenticity that distinguishes a thoughtfully restored mid-century home from a generic renovation.

    Yet sourcing period-appropriate hardware presents unique challenges. Original pieces may be damaged, missing entirely, or insufficient for your needs. Tracking down authentic replacements often feels like an archaeological expedition—requiring patience, research, and a network of specialized resources.

    At Clyne Heritage Homes, we’ve compiled this comprehensive guide to help you navigate the sometimes confusing world of mid-century hardware sourcing, whether you’re looking for exact vintage matches or quality reproductions that honor your home’s architectural integrity.

    Understanding Mid-Century Hardware Characteristics

    Before beginning your search, it helps to understand the distinctive characteristics of mid-century hardware:

    Materials and Finishes

    Common Materials:

    • Brushed or satin aluminum
    • Brass (often with clear lacquer finish)
    • Stainless steel
    • Copper and bronze
    • Bakelite and other early plastics
    • Ceramic (particularly for knobs)

    Typical Finishes:

    • Satin or brushed rather than highly polished
    • Anodized aluminum in various colors
    • Enamel coating in signature mid-century hues
    • Natural patina on copper and bronze
    • Combination materials (metal with plastic or ceramic)

    Design Characteristics

    Mid-century hardware typically featured:

    • Clean, geometric forms
    • Minimal ornamentation
    • Emphasis on function
    • Integration with architectural elements
    • Innovative use of new manufacturing techniques
    • Distinctive shapes (starburst, atomic, boomerang motifs)

    “Hardware in mid-century homes wasn’t an afterthought—it was an integral part of the design language,” explains architectural historian Margaret Chen. “Architects and builders chose hardware that complemented the home’s overall aesthetic while embracing the new manufacturing capabilities of the post-war era.”

    Assessing Your Needs: Inventory Before Shopping

    Before diving into sourcing, create a detailed inventory of your hardware needs:

    1. Document existing original hardware
      • Photograph each type from multiple angles
      • Measure dimensions precisely
      • Note materials and finishes
      • Record any manufacturer markings or model numbers
      • Assess condition and function
    2. Identify missing elements
      • Check for inconsistencies suggesting replacements
      • Look for empty mounting holes indicating removed hardware
      • Research your home’s model or architect for clues about original specifications
    3. Determine reproduction vs. vintage preference
      • Consider durability requirements for frequently used items
      • Assess budget constraints (some vintage pieces command premium prices)
      • Evaluate authenticity priorities for different areas of your home

    This inventory becomes your shopping guide, helping you recognize appropriate pieces when you encounter them and avoid expensive mistakes.

    Resources for Vintage Hardware

    Architectural Salvage Yards

    Architectural salvage yards remain one of the best sources for authentic vintage hardware. These businesses rescue materials from buildings slated for demolition, creating repositories of period-appropriate elements.

    Notable Salvage Resources:

    • Rejuvenation Salvage (Portland, Oregon) – Specializes in mid-century to present
    • Architectural Salvage of San Diego (California) – Extensive hardware collection
    • ReHouse Architectural Salvage (Rochester, New York) – Well-organized hardware department
    • Olde Good Things (Multiple locations) – High-end architectural elements
    • Community Forklift (Hyattsville, Maryland) – Affordable salvaged materials
    • Peninsula House Numbers (Melbourne, Australia) – Although not a salvage yard PHN create beautiful house numbers and letters inspired by vintage typography.

    Shopping Tips:

    • Visit regularly as inventory changes constantly
    • Bring your inventory list and measurements
    • Take photos of spaces where hardware will be installed
    • Purchase matching sets when possible (individual pieces may be hard to match later)
    • Inspect functionality carefully before purchasing

    Specialized Online Marketplaces

    Several online platforms specialize in vintage architectural elements:

    Dedicated Vintage Hardware Sites:

    • eBay’s Vintage Hardware & Salvage category
    • Etsy’s Vintage Hardware shops
    • Chairish (premium vintage items)
    • 1stDibs (high-end architectural elements)
    • Vintage Hardware & Lighting (curated vintage and reproduction pieces)

    Search Strategies:

    • Use specific terminology (“mid-century brass drawer pull” rather than “old drawer handle”)
    • Include measurements in your search
    • Search both broad categories and specific manufacturers
    • Save searches to receive notifications when new items are listed
    • Ask sellers for additional photos and measurements before purchasing

    David and Elena, who restored a 1957 Palmer & Krisel home in Palm Springs, created a “hardware hunting” document with photos and measurements of existing pieces. “When we found matching door backplates on eBay, we immediately recognized them because we had all the details at our fingertips,” Elena explains. “That level of preparation makes all the difference in successful online sourcing.”

    Estate Sales and Home Auctions

    Homes from the mid-century period are increasingly changing hands as original owners downsize or pass away. Estate sales and auctions of these properties can yield treasure troves of period-appropriate hardware:

    Finding Relevant Sales:

    • Register for estate sale notification services
    • Follow estate sale companies on social media
    • Check auction listings for mid-century home contents
    • Network with real estate agents specializing in mid-century properties

    Strategic Approach:

    • Arrive early for best selection
    • Bring tools for removal if purchasing installed items
    • Look beyond obvious areas—check basements and garages for stored extras
    • Inquire about unlisted items that might match your needs

    Networking with Fellow Enthusiasts

    The mid-century renovation community is passionate and collaborative. Connecting with other enthusiasts can lead to valuable hardware sources:

    Community Resources:

    • Modernism Week events (Palm Springs and other locations)
    • Mid-Century Modern Facebook groups
    • Regional MCM homeowner associations
    • Eichler, Alexander, or other builder-specific networks
    • Historic preservation organizations

    Michael, restoring a 1962 Streng Brothers home in Sacramento, found his distinctive doorknobs through a Facebook group dedicated to these regional mid-century homes. “Another homeowner had extras stored in their garage for thirty years. They were exactly what we needed and had been less than five miles away all along.”

    Resources for Quality Reproductions

    When vintage pieces aren’t available or practical, quality reproductions can provide period-appropriate alternatives. The best reproduction sources understand mid-century design principles rather than merely copying popular styles.

    Specialized Reproduction Manufacturers

    Several companies focus specifically on creating hardware appropriate for mid-century homes:

    Mid-Century Specialist Companies:

    • Rejuvenation – Extensive line of period-authentic hardware and lighting
    • Schoolhouse – Quality reproductions with mid-century influences
    • House of Antique Hardware – Period-specific reproduction collections
    • Emtek – Contemporary hardware with mid-century design influences
    • Nostalgic Warehouse – Reproduction hardware organized by era
    • Signature Hardware – Range of mid-century bathroom fixtures and hardware

    Evaluation Criteria:

    • Material quality and authenticity
    • Attention to period-correct details
    • Availability of complete matching sets
    • Installation compatibility with original mountings
    • Finish options appropriate to the period

    Custom Fabrication Services

    For unique or rare hardware pieces, custom fabrication might be the best solution:

    Custom Hardware Resources:

    • Local metalworking artisans
    • 3D printing services for prototyping or small production runs
    • University architecture or design programs (sometimes offer fabrication services)
    • Restoration specialists who offer reproduction services

    The Wilson family, restoring a 1959 custom home in Connecticut, worked with a metalsmith to recreate the home’s distinctive front door handle after an exhaustive search for a replacement proved fruitless. “Having it custom-made was actually more cost-effective than we expected,” notes homeowner Rebecca Wilson. “And the result is indistinguishable from the original.”

    Category-Specific Resources

    Different types of hardware often have specialized sources worth exploring:

    Door Hardware

    Vintage-Inspired Door Hardware Sources:

    • Schlage – Their mid-century line includes appropriate styles
    • Baldwin – Higher-end door hardware with clean lines
    • Emtek – Modern interpretations of mid-century motifs
    • Weslock – Affordable reproductions of common mid-century styles

    Door Hardware Considerations:

    • Security needs may necessitate modern internal mechanisms
    • ADA compliance might be required for public or rental properties
    • Consider compatibility with existing door preparations
    • Finish consistency throughout the home

    Cabinet and Drawer Hardware

    Cabinet Hardware Resources:

    • Häfele – Clean-lined contemporary pulls with mid-century compatibility
    • Mockett – Architectural hardware with mid-century influences
    • Atlas Homewares – Specific mid-century inspired collections
    • Rejuvenation – Period-authentic cabinet hardware

    Cabinet Hardware Tips:

    • Consider standardizing on currently available sizes to simplify future replacements
    • Purchase extra pieces for future needs
    • Test ergonomics before committing to house-wide installation
    • Look for solid brass or stainless construction for durability

    House Numbers and Mailboxes

    Address Element Sources:

    • Modern House Numbers – Specifically designed for mid-century aesthetics
    • Neutra House Numbers (Design Within Reach) – Licensed reproductions of Richard Neutra’s designs
    • Address Art – Custom fabrication of period-appropriate numbers
    • Modbox USA – Authentic mid-century mailbox designs

    “House numbers and mailboxes are the first impression of your home’s period authenticity,” notes preservation consultant James Rodriguez. “They set expectations for the attention to detail visitors will find throughout the property.”

    Bathroom and Kitchen Fixtures

    Period-Appropriate Fixture Sources:

    • Kohler – Maintains archives of historic designs
    • American Standard – Offers some legacy designs
    • Waterworks – Higher-end period-inspired fixtures
    • Kingston Brass – Affordable retro-styled fixtures
    • Aqua Vintage – Specializes in vintage-style fixtures

    Fixture Adaptation Strategies:

    • Consider vintage-look faucets with modern cartridges for reliability
    • Use vintage sinks with contemporary faucets for easier maintenance
    • Maintain original tub but update shower fixtures for water efficiency

    Restoration vs. Replacement: Making the Decision

    Sometimes, restoring existing hardware is preferable to replacement. Consider these factors:

    When to Restore Original Hardware

    • When pieces have historical or architectural significance
    • When the patina contributes to the home’s character
    • When the design is unique and difficult to replace
    • When original finishes are in reasonable condition

    Restoration Resources

    • Metal refinishing specialists
    • Brass polishing and relacquering services
    • Ceramic restoration experts
    • Specialty cleaners for different materials

    Thomas and Sarah, renovating their 1961 home in Denver, chose to restore their original brass door hardware rather than replace it. “The aging process had created a beautiful patina that new hardware couldn’t replicate,” explains Thomas. “A restoration specialist cleaned, repaired, and applied a clear protective coating that preserved that character while making everything functional again.”

    Installation and Maintenance Considerations

    Proper installation and maintenance ensure your carefully sourced hardware performs well over time:

    Installation Best Practices

    • Document original installation methods before removal
    • Use appropriate tools to prevent damage
    • Consider hiring professionals for complex or valuable hardware
    • Maintain original mounting holes when possible
    • Properly prepare surfaces before installing new hardware

    Maintenance for Longevity

    • Select appropriate cleaning products for each material
    • Establish regular maintenance schedules
    • Consider protective coatings for frequently used items
    • Address issues promptly before they require major restoration
    • Document maintenance procedures for future homeowners

    Case Study: A Comprehensive Approach

    The Rodriguez family’s experience restoring a 1958 Palmer & Krisel home in San Diego illustrates a successful multi-sourced approach to hardware authenticity:

    Their Hardware Strategy:

    • Original preservation: Restored and maintained all original bathroom fixtures and cabinet hinges
    • Vintage replacement: Sourced period-appropriate door hardware from architectural salvage
    • Quality reproduction: Used Rejuvenation’s mid-century line for missing cabinet pulls
    • Custom fabrication: Commissioned reproduction house numbers based on original ghosting marks
    • Modern with period aesthetics: Selected contemporary light fixtures with mid-century design language

    “We developed a hierarchy of authenticity,” explains Elena Rodriguez. “Public spaces and distinctive elements received the most attention to period detail, while behind-the-scenes hardware could be more flexibility sourced.”

    Conclusion: Hardware as the Finishing Touch

    In mid-century renovation, hardware represents both the finishing touch and the daily tactile connection to your home’s heritage. Through thoughtful sourcing—whether vintage, reproduction, or custom—these elements contribute significantly to the authentic experience of a heritage property.

    The process requires patience and persistence, but the results offer satisfaction with every door opened, every cabinet accessed, and every appreciation of your home’s cohesive design integrity. As mid-century architect Charles Moore once noted, “Good buildings come from good people and all problems are solved by good design.” The same might be said for good renovations—they come from dedicated homeowners solving the puzzle of authenticity one hardware piece at a time.


    Do you have favorite sources for period-appropriate hardware? Share your recommendations in the comments below to help fellow heritage homeowners in their search for authenticity.

  • The Hidden Challenges of Heritage Home Ownership: What to Expect in Your First Year

    The Hidden Challenges of Heritage Home Ownership: What to Expect in Your First Year

    You’ve done it—you’ve purchased that gorgeous mid-century gem with the butterfly roof, floor-to-ceiling windows, and original terrazzo floors. After the closing papers are signed and the keys are in hand, reality sets in: you’re now the steward of a piece of architectural history. While the distinctive character and craftsmanship of heritage homes is their greatest asset, first-time owners often find themselves facing unexpected challenges during that critical first year.

    At Clyne Heritage Homes, we’ve guided countless homeowners through this transition. Here’s our honest guide to what you might encounter in your first twelve months of heritage home ownership—and how to navigate it with your sanity and bank account intact.

    The Emotional Rollercoaster

    The Honeymoon Phase

    Most heritage homeowners experience an initial period of sheer delight. You’ll find yourself admiring original details at odd hours, researching your home’s architect, and enthusiastically pointing out features to every visitor who crosses your threshold.

    “I spent the first month just sitting in different rooms, watching how the light changed throughout the day,” recalls Michael, owner of a 1958 post-and-beam in Silver Lake. “I was completely in love with the way the architect had considered the sun patterns.”

    This period is precious—savor it! Document your initial impressions and take plenty of “before” photos. This enthusiasm will become fuel for the more challenging phases ahead.

    The Overwhelming Reality Check

    Invariably, the honeymoon gives way to a more sobering phase when you begin noticing all the issues requiring attention. For Rebecca and Daniel, owners of a 1962 Palmer & Krisel home in Palm Springs, this moment came during their first rainstorm.

    “Water was coming in through three different spots in the roof, the original gutters were completely overwhelmed, and we discovered the previous owner had painted over water damage instead of fixing it,” Rebecca shares. “We went from ‘This house is perfect!’ to ‘What have we done?’ in the span of two hours.”

    This reality check is normal and temporary. The key is to:

    • Prioritize issues based on structural importance and safety
    • Create a phased plan rather than attempting to address everything immediately
    • Remember what attracted you to the home in the first place

    Finding Your Preservation Philosophy

    As you begin addressing issues, you’ll need to develop your personal approach to preservation. This often becomes clear during your first few projects.

    Some homeowners opt for strict historical accuracy, seeking out period-appropriate materials and techniques regardless of cost or convenience. Others take a more flexible approach, preserving key elements while making practical concessions to modern living.

    “We had to decide early on what mattered most to us,” explains Thomas, owner of a 1956 Eichler in Palo Alto. “We chose to invest in restoring the mahogany paneling and original concrete floors, but we compromised on the kitchen, keeping the layout but updating the appliances and countertops with modern equivalents.”

    There’s no universally correct approach—just be intentional about your decisions rather than making them reactively in the moment of crisis.

    The Practical Challenges

    The Specialized Contractor Hunt

    Perhaps the most frustrating first-year challenge is finding contractors who understand and respect heritage homes. The specialized knowledge required for proper restoration isn’t taught in standard contractor training.

    Lisa, who owns a 1959 ranch in Denver, cycled through three different contractors before finding the right match. “The first one wanted to rip out all the original windows. The second didn’t understand how to work with lath and plaster walls. The third quoted a reasonable price but then disappeared for weeks at a time.”

    To find heritage-friendly professionals:

    • Ask for recommendations from local historical societies or preservation groups
    • Look for contractors who showcase heritage projects in their portfolio
    • Request references from homeowners with similar properties
    • Be willing to wait for the right professional rather than hiring the first available option
    • Consider consulting with a preservation architect who can guide other contractors

    The Budget Reality

    Heritage home enthusiasts often experience significant sticker shock during their first year. Restoration and repair of period-specific elements typically costs 20-40% more than standard home maintenance.

    Common budget surprises include:

    Electrical updates: Mid-century homes often have electrical systems that don’t meet current codes or contemporary power needs. Updating while preserving original features requires skillful work.

    Hidden damage: Previous “quick fix” solutions often masked underlying issues. Removing a layer of 1980s paneling might reveal water damage that needs addressing before restoration can proceed.

    Sourcing period materials: Finding authentic replacements for damaged elements often involves specialized suppliers, salvage hunting, or custom fabrication.

    Specialized knowledge: The expertise required for proper heritage restoration commands premium rates—but is well worth it to avoid costly mistakes.

    To manage these financial realities:

    • Build a contingency fund of at least 20% beyond initial estimates
    • Prioritize projects affecting structural integrity and safety
    • Consider phasing renovations over several years
    • Learn which projects you can realistically handle yourself

    The Time Factor

    First-time heritage homeowners are often unprepared for how long proper restoration takes. Unlike new construction with standardized materials and techniques, heritage work requires research, sourcing, and often custom solutions.

    “Our kitchen renovation was supposed to take six weeks,” recalls Jennifer, owner of a 1961 split-level in Chicago. “It ended up taking five months because we had to have custom cabinet fronts made to match the originals, and the terrazzo floor restoration took three times longer than expected.”

    Embrace a more relaxed timeline by:

    • Adding 50-100% to time estimates from contractors
    • Planning renovations during seasons when you can manage without that space
    • Finding joy in the gradual transformation rather than expecting instant results

    System-Specific Challenges

    HVAC Realities

    Heating, ventilation, and air conditioning present unique challenges in mid-century homes, which were often designed with passive heating and cooling in mind rather than central systems.

    Common first-year HVAC surprises include:

    Inadequate insulation: Many mid-century homes have minimal insulation by today’s standards, making efficiency upgrades necessary for comfort and reasonable utility bills.

    Space constraints: Original construction rarely accounted for the ductwork needed for modern HVAC systems, requiring creative solutions.

    Balancing preservation and comfort: Adding cooling to a home designed before air conditioning was common requires thoughtful integration that doesn’t compromise architectural integrity.

    Robert and Susan, owners of a 1955 Alexander home in Tucson, found themselves sweating through their first summer. “The clerestory windows and concrete floors were designed for passive cooling, but with climate change, the house was regularly reaching 90 degrees inside,” Robert explains. “We had to get creative with mini-split systems and strategic shade additions to make it livable while preserving the design.”

    Plumbing Peculiarities

    Water systems in heritage homes often hide surprises that emerge during that first year:

    Galvanized steel pipes: Common in mid-century construction, these have a lifespan of 40-50 years—meaning they’re likely due for replacement.

    Non-standard fixtures: Original bathroom and kitchen fixtures often require specialized parts that aren’t available at standard hardware stores.

    Unusual layouts: Mid-century plumbing sometimes followed different conventions, with pipes running through unexpected areas or accessible only through creative means.

    Catherine discovered this when her 1957 home’s kitchen sink backed up. “The plumber had to access pipes through a small panel in the back of a closet in an adjacent room. He said he’d never seen anything like it and actually took photos to show his colleagues.”

    Roof and Envelope Issues

    The distinctive rooflines that make mid-century homes architecturally exciting also create unique maintenance challenges:

    Flat or low-slope roofs: Common in mid-century design, these require different waterproofing approaches than conventional pitched roofs and are less forgiving of deferred maintenance.

    Large expanses of glass: The floor-to-ceiling windows that create that indoor-outdoor connection may need specialized weather sealing or restoration.

    Unconventional materials: Experimental materials that were cutting-edge in the 1950s and 60s sometimes haven’t aged as well as traditional options and may require specialized repair approaches.

    Creating Your Heritage Home Maintenance Plan

    Based on the experiences of hundreds of first-year heritage homeowners, we recommend this approach to managing your first year:

    First Three Months: Assessment and Emergency Addressing

    • Hire inspectors specialized in heritage properties to assess major systems
    • Address any immediate safety concerns (electrical, structural, etc.)
    • Document all original features with photographs and measurements
    • Research your home’s history and original design intentions
    • Join local and online communities of similar homeowners for support

    Months 3-6: Planning and Prioritization

    • Develop a 3-5 year phased plan for restoration and updates
    • Create a dedicated heritage home maintenance fund
    • Build relationships with specialized contractors and suppliers
    • Determine which projects require professional help and which you can DIY
    • Consider consulting with a preservation architect for major renovations

    Months 6-12: Initial Projects and Learning

    • Begin with smaller, manageable restoration projects to learn the process
    • Develop your maintenance routines for different seasons
    • Invest in proper tools and materials for ongoing care
    • Document all work done for future reference and home history
    • Celebrate your successes, no matter how small

    The Unexpected Joys

    While we’ve focused on challenges, the first year of heritage home ownership also brings unexpected pleasures:

    Community connections: Heritage homeowners often find themselves welcomed into communities of like-minded enthusiasts who share knowledge, resources, and moral support.

    Historical discoveries: Many owners find original blueprints, photographs, or even connections to previous residents that deepen their home’s story.

    New skills: The necessity of certain DIY tasks leads many heritage homeowners to develop craftsmanship skills they never anticipated.

    Deep satisfaction: There’s a unique pride in knowing you’re preserving something of cultural and architectural value for future generations.

    David, who restored a 1960 A-frame in New Hampshire, summarizes it well: “The first year was far more expensive and stressful than we anticipated. But watching the house come back to life, and feeling like we were honoring the original vision of the architect—that made every challenge worthwhile.”

    Conclusion: Embrace the Journey

    Your first year as a heritage homeowner will likely test your patience, budget, and resolve. You’ll make mistakes, encounter unexpected challenges, and occasionally question your decision. But you’ll also experience moments of profound satisfaction as you breathe new life into a property that deserves preservation.

    Remember that perfect is the enemy of good in heritage home ownership. Each generation of owners contributes to a home’s ongoing story—your chapter doesn’t need to be flawless, just thoughtful and respectful of what came before.


    Are you in your first year of heritage home ownership? Share your biggest surprises or challenges in the comments below. For personalized advice on navigating your specific situation, contact us through our website—we’re here to help!